Use OGC Services
The WMS/WFS Flow service offered by CH-OSM provides direct access to vector data layers under QGIS or any other OGC service client environment. These services are referenced in an Isogeo catalogue, offering a single point of contact, a search interface and metadata consultation. OGC services are available at the following URL:
WMS 1.3.0:
https://ch-osm-services.geodatasolutions.ch/geoserver/ows?service=wms&version=1.3.0&request=GetCapabilities&srsName=EPSG:2056
Use in QGIS
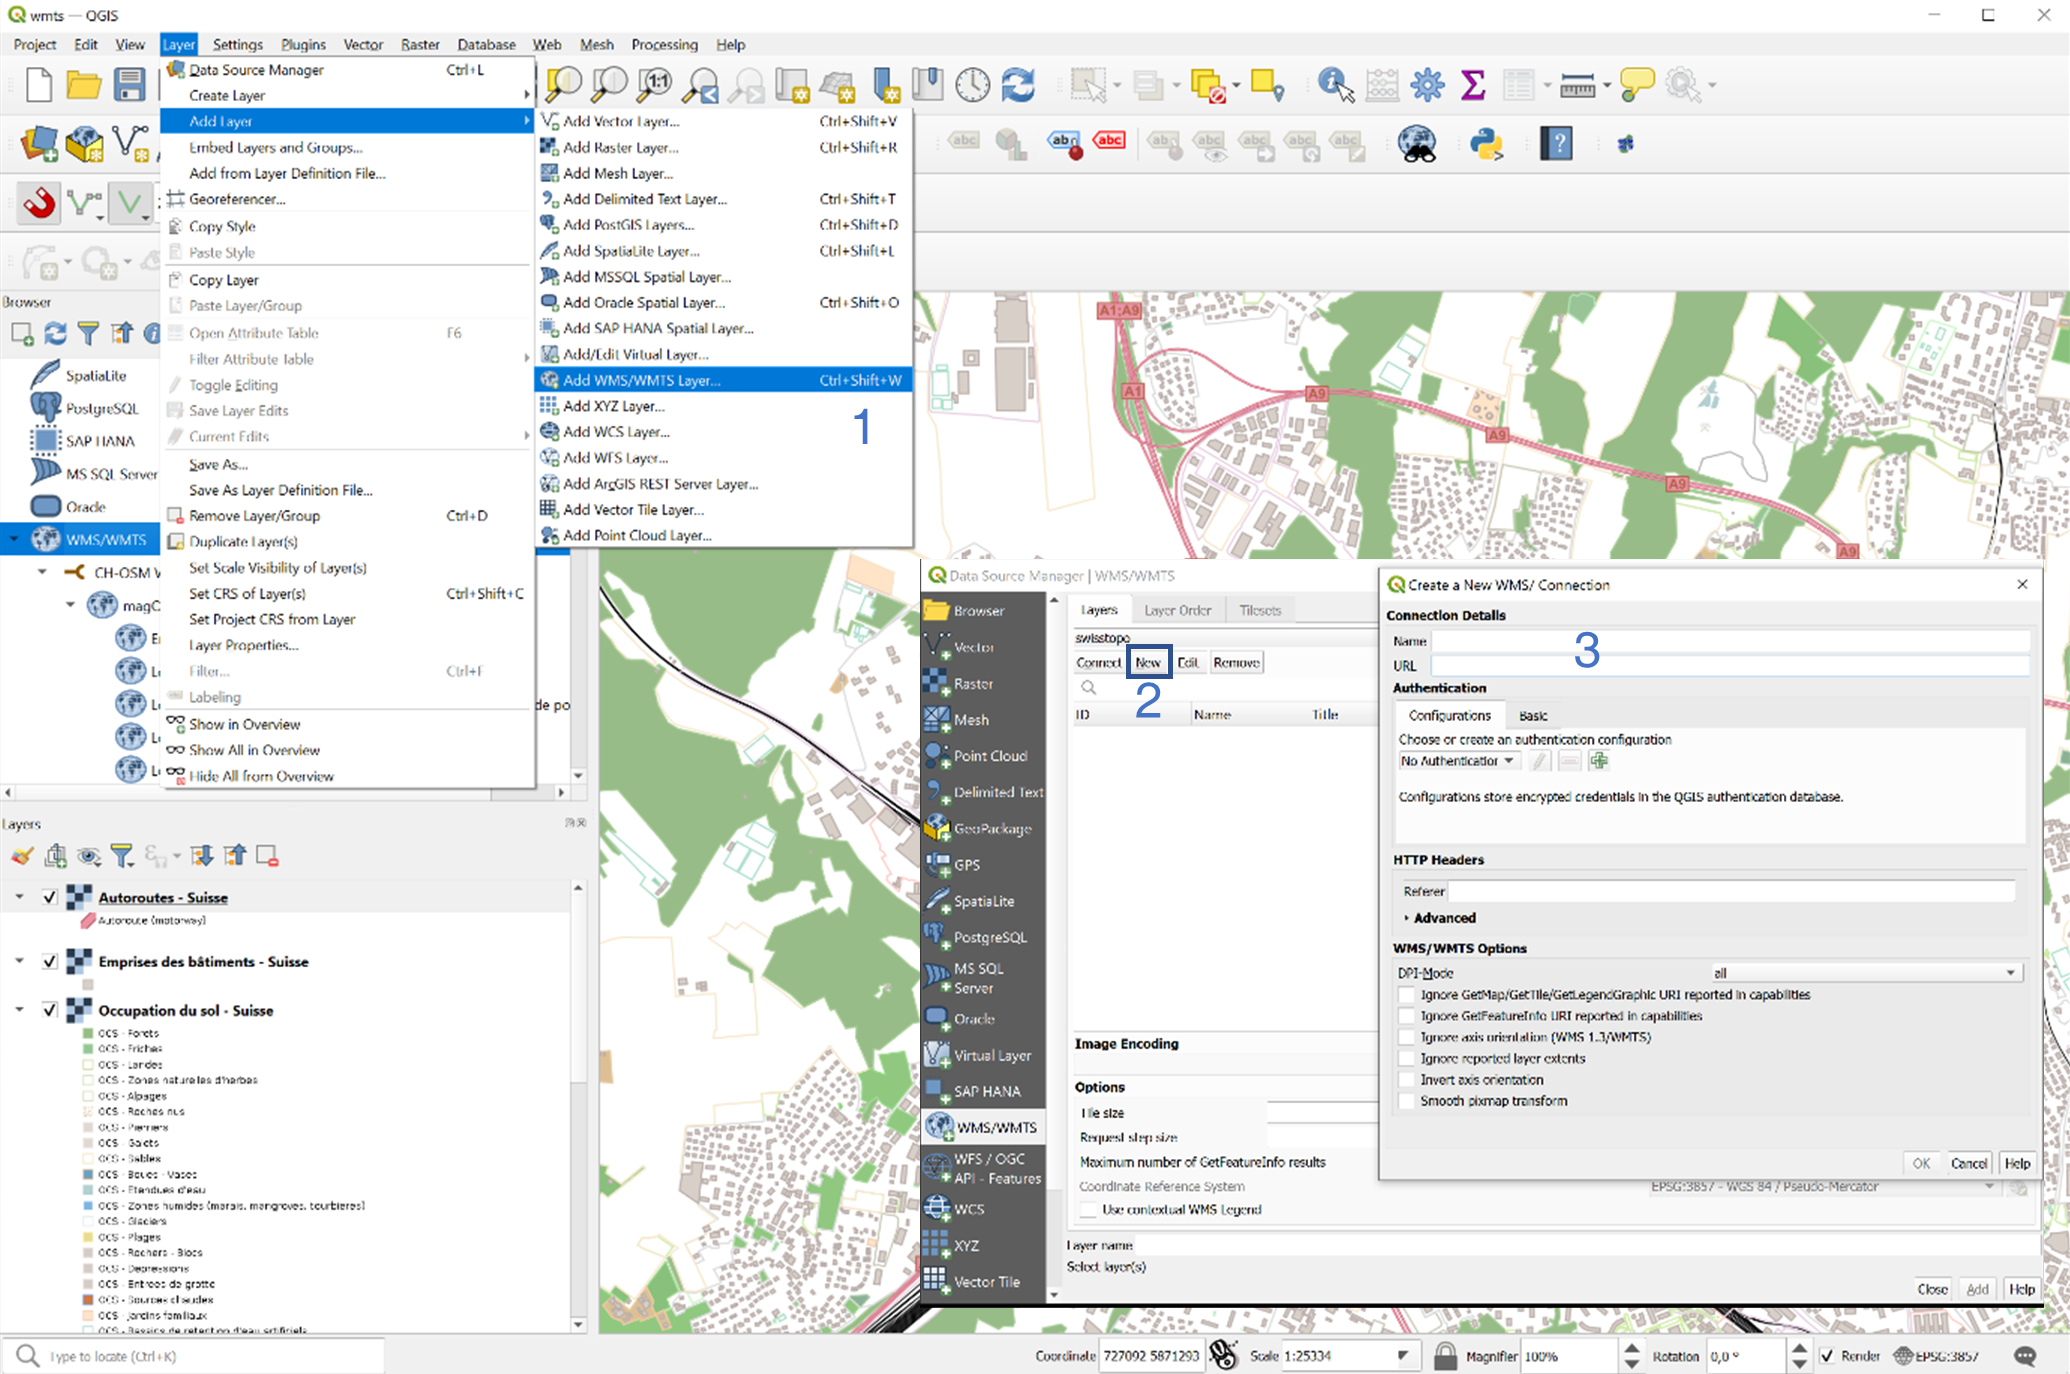
To add a CH-OSM WMS/WMTS or WFS layer in QGIS
- Click on Layer → Add Layer → Add WMS/WMTS Layer… or Add WFS Layer… (just below).
- In the new window, click on the “New” button, to establish a new connection.
- Chose a name for you connection and copy-paste the previous URL from the OCG section. Click “OK” to create the connection.
Use in uMap
To use a WFS stream in uMap, you can create a map in uMap. Click on the ![]() button and Add a layer. In the Layer properties, select Remote data and fill in for example the following URL for the swiss hospitals:
button and Add a layer. In the Layer properties, select Remote data and fill in for example the following URL for the swiss hospitals:
Finally chose geojson format in the Format dropdown menu (just below the URL field). Click on the Save blue button on the top of the page, to see the data on your map. Sometimes, you have to refresh the page after saving it.
Use in ArcGIS Pro
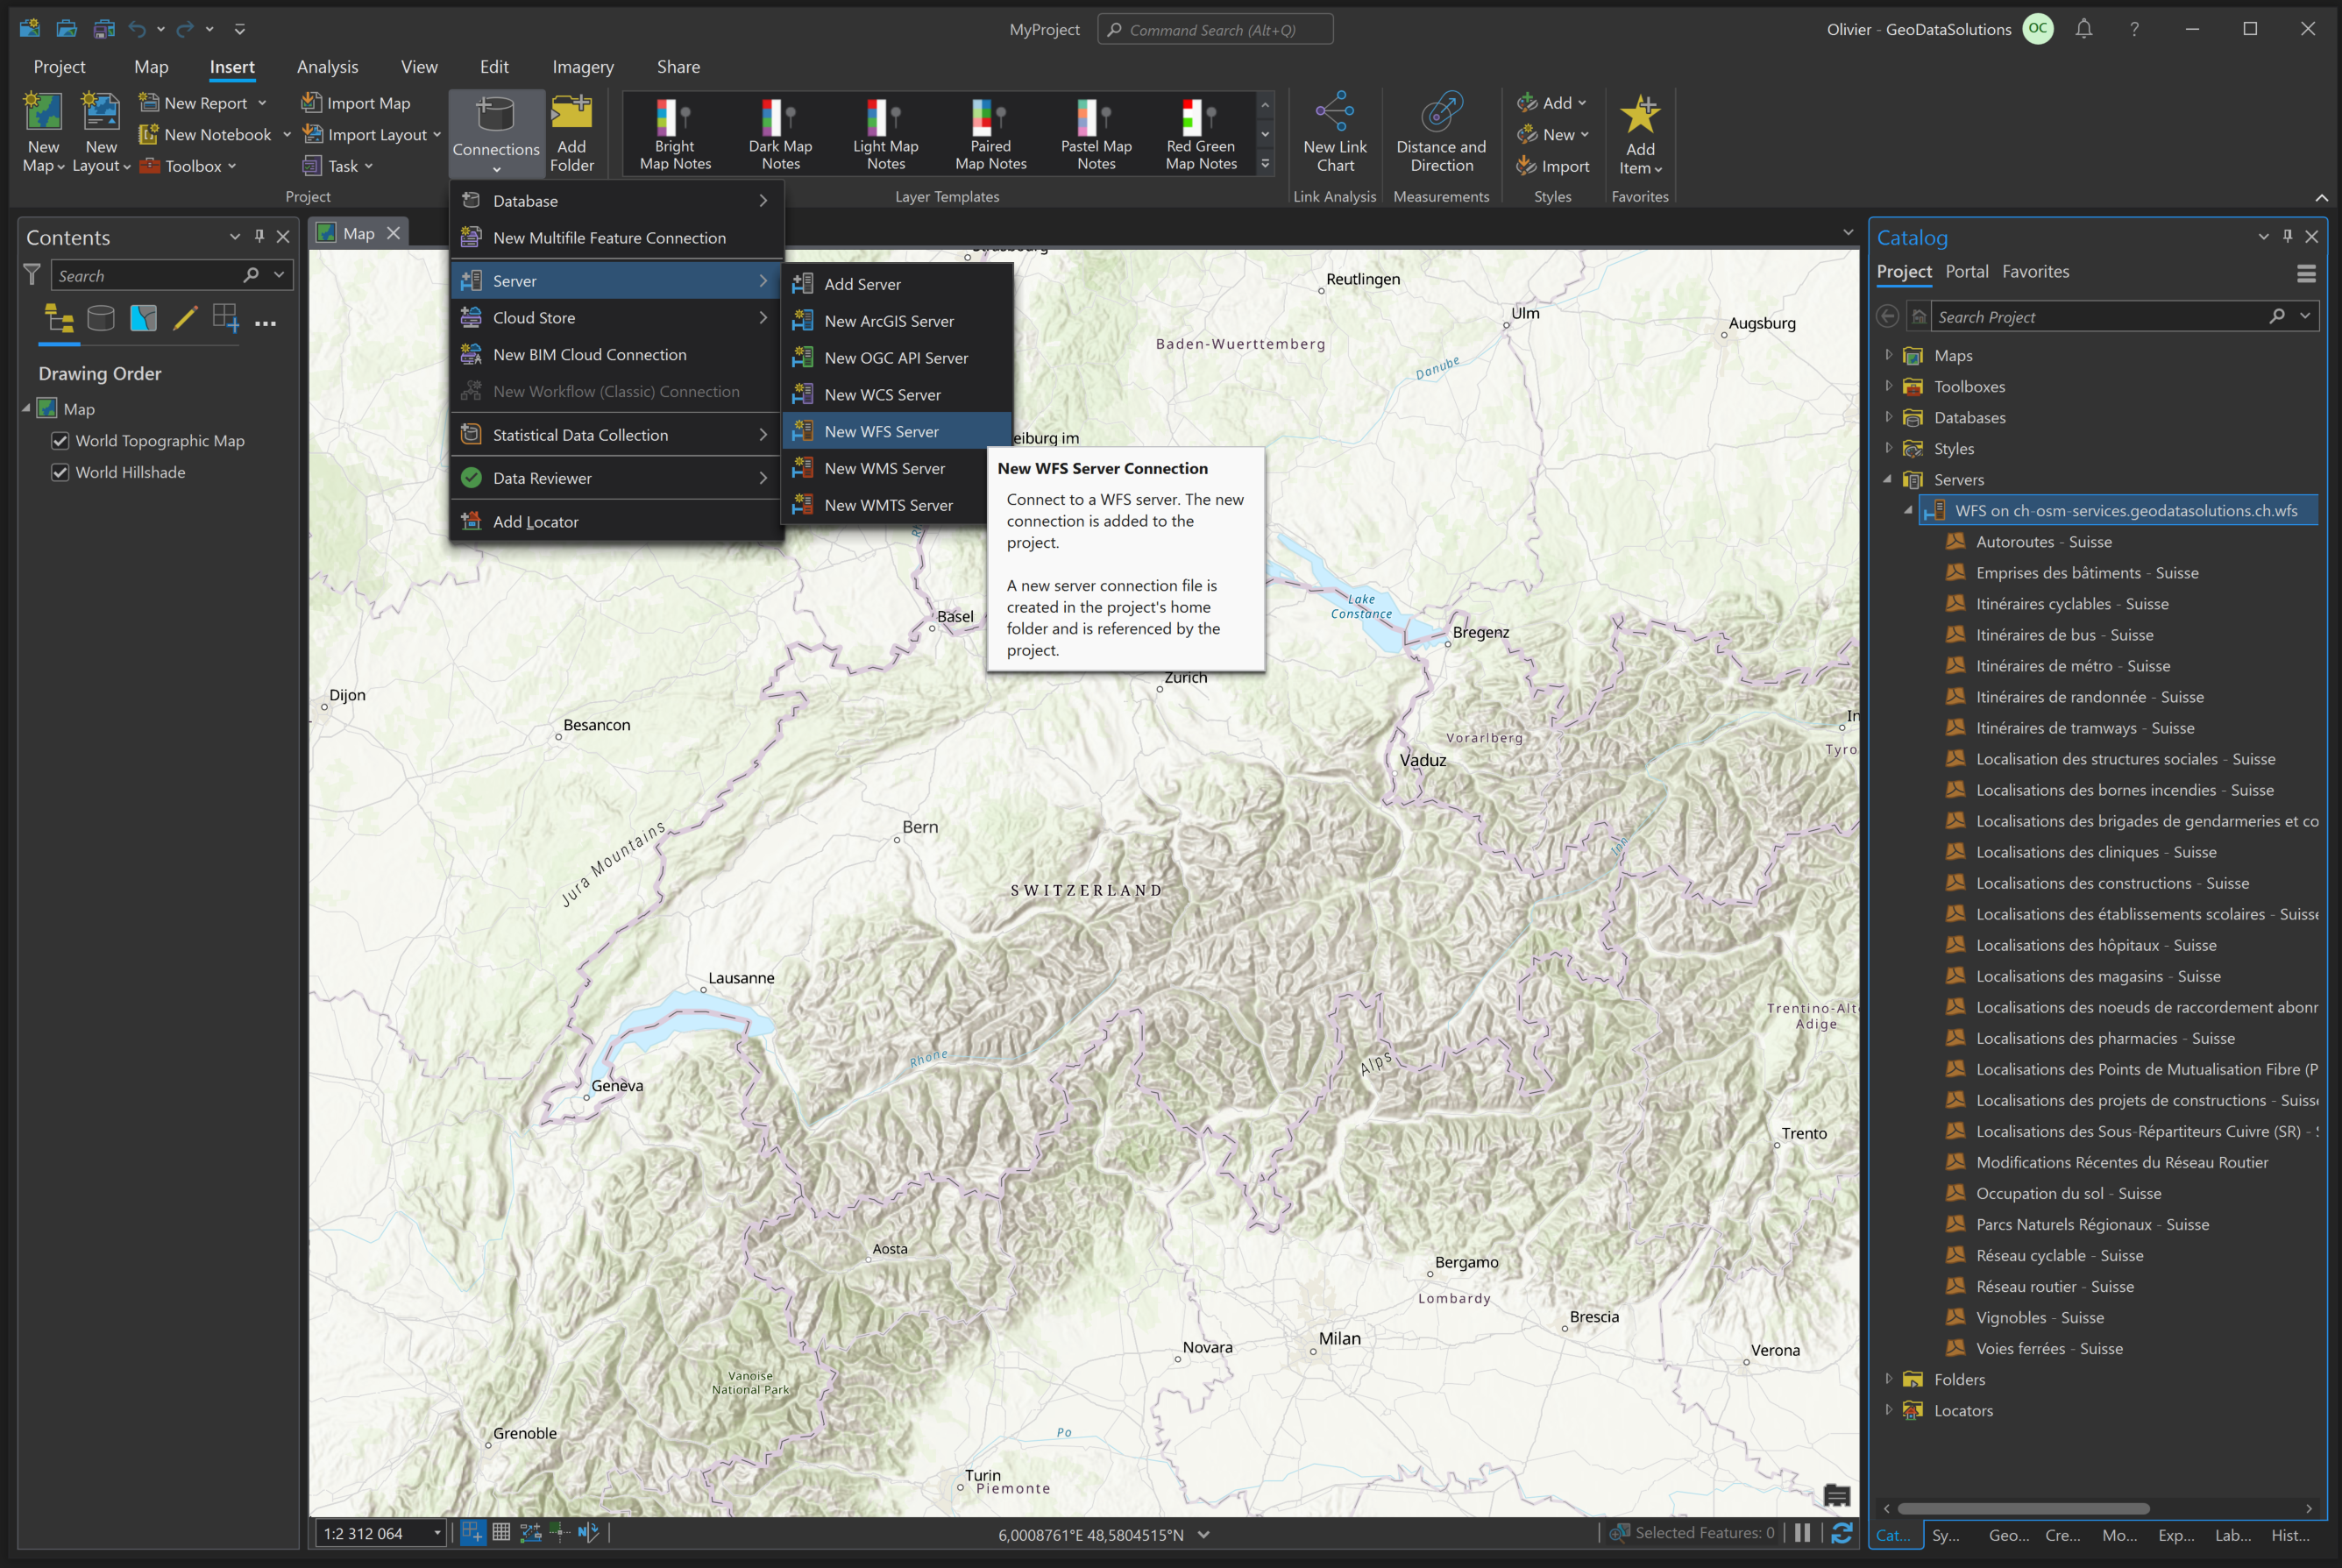
To use the services in ArcGIS Pro, you can open a project and click on Insert → Connections → Server and chose:
- New WMS and add the URL in the OCG Section (top of this page)
- New WFS and add the URL in the OCG Section (top of this page)
After that, you can add the layers you want from the Catalog in the Servers folder.
Use in ArcGIS Online
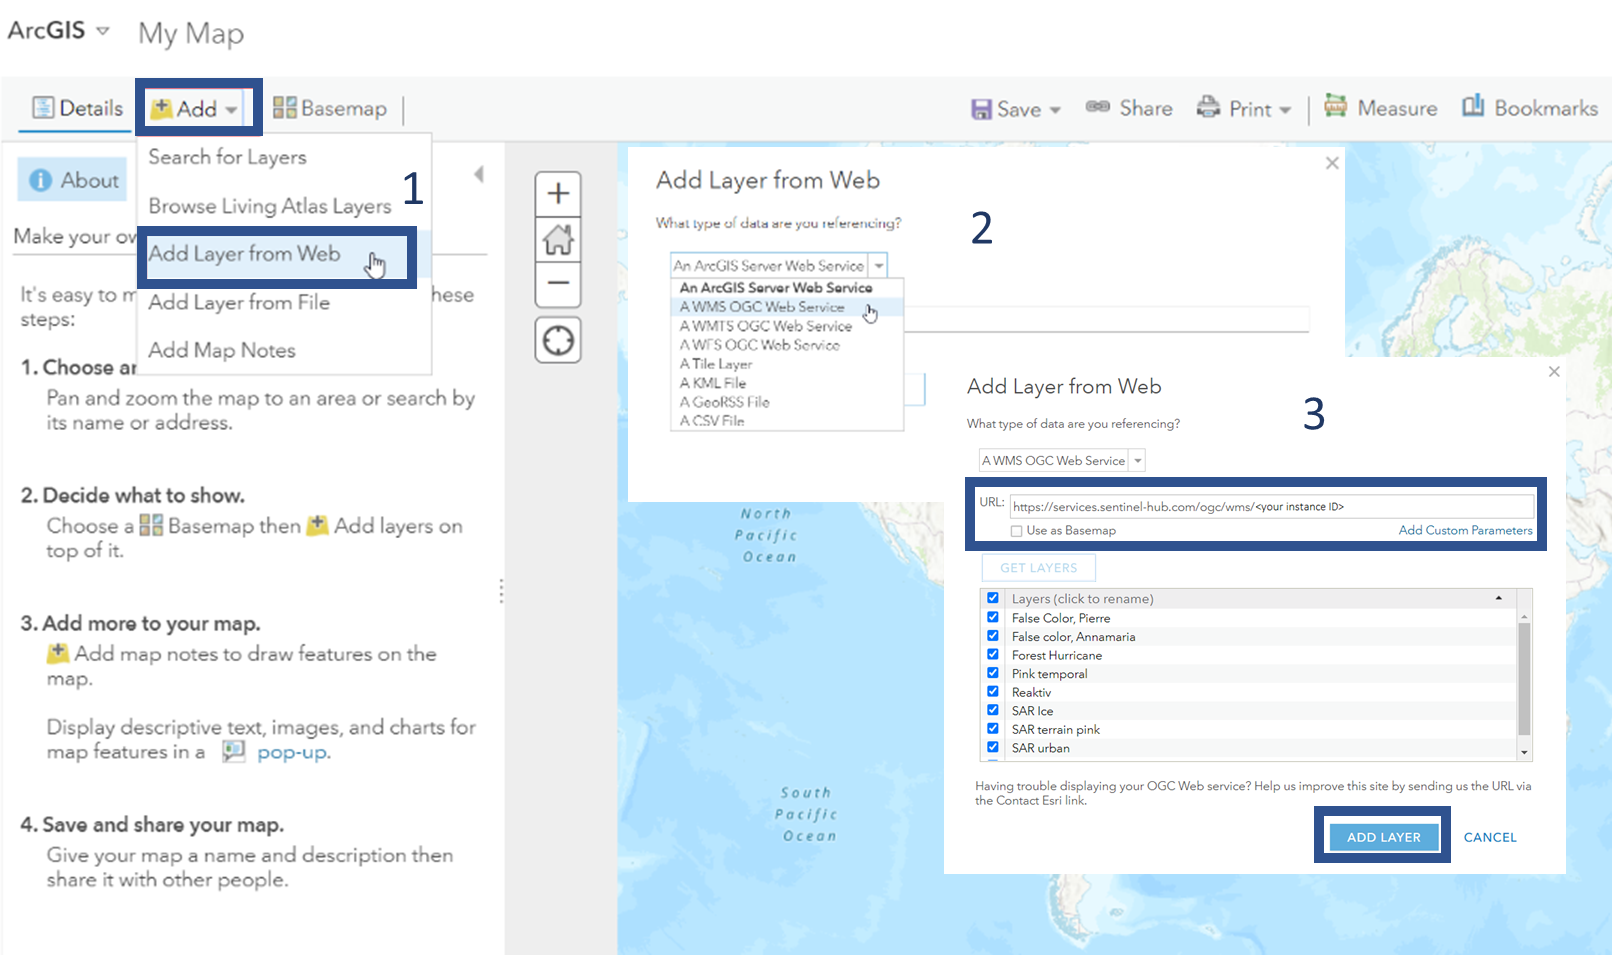
In the Layer section, click on [ ] and select Add Layer from URL. Copy and paste the URL, click next and select the layers you on your map.
In the Map section, The world map opens. On the top left, click on ![]() , to open a dropdown menu. Select Add Layer from Web. An Add Layer from Web dialog opens. Then select WMS/WMTS or WFS OGC Service and copy/past the URL.
, to open a dropdown menu. Select Add Layer from Web. An Add Layer from Web dialog opens. Then select WMS/WMTS or WFS OGC Service and copy/past the URL.

